QR codes for an event: tickets, check-in and programme
Atualizado em 20 de setembro de 20268 min de leitura
Artigo em inglês
Este guia ainda não está traduzido para o seu idioma, por isso está a ler a versão inglesa.
An event is the hardest test a QR code faces: thousands of scans in a few hours, a crowded entrance, patchy mobile data and a programme that changes until the last minute. The codes that survive are planned weeks earlier, not exported the night before. Here is the full set, in the order you should prepare it.
The four codes an event needs
| Code | Where it lives | Type | Why |
|---|---|---|---|
| Ticket | One per attendee, in the confirmation email or wallet pass | Unique, one per row of your list | Each has to be identifiable and usable once |
| Check-in / registration | Entrance banner, welcome desk, invitation | Dynamic | The destination moves from the form to the schedule the moment doors open |
| Programme | Badges, signage, table cards, printed handout | Dynamic | Speakers and rooms change after the signage is printed |
| Feedback | Closing slide, exit banner, badge back | Dynamic | Same printed asset can be reused for the next edition |
Step 1 — generate one ticket code per attendee
Ticket codes come from your attendee list, not from typing. Export the list as CSV with one row per attendee, then produce the whole batch in one pass.
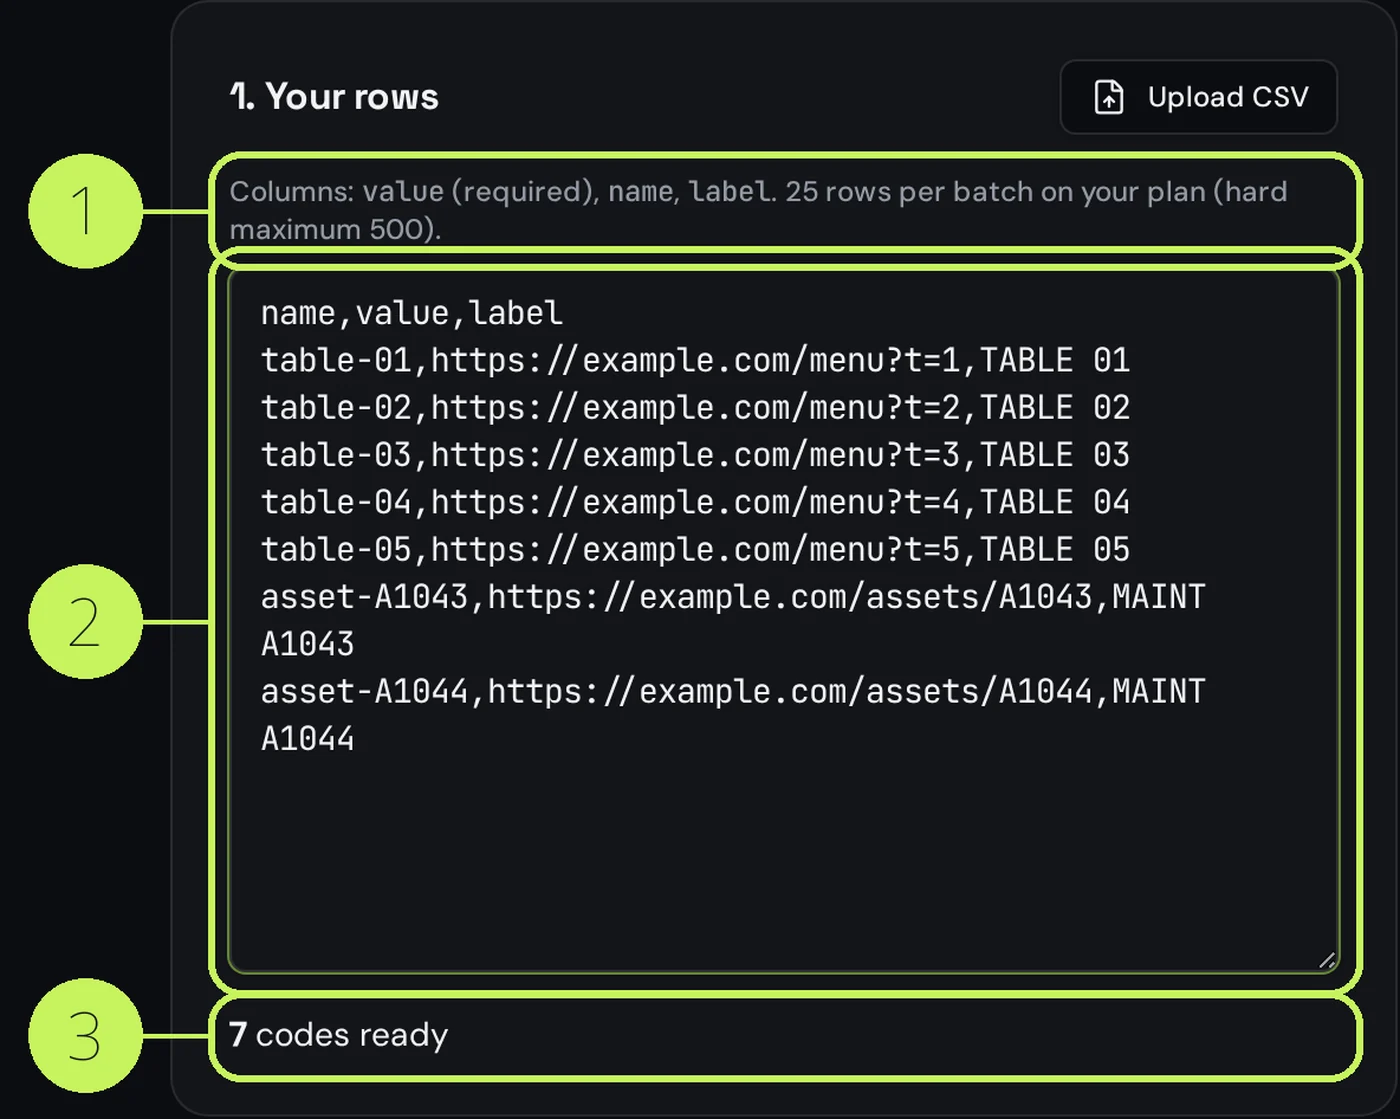
- Prepare two columns: a name that identifies the attendee (<code>ticket-0148-rossi</code>) and the destination that validates them.
- Point each destination at your ticketing system's own URL, with the ticket reference in it — that system, not the QR code, decides whether entry is valid.
- Paste the CSV into the <a href="/tools/bulk-qr-code-generator">bulk generator</a> and download the batch as a ZIP.
- Keep the file names identical to the ticket references, so a support request takes seconds to trace.
- Send each attendee their own image — never a shared code, and never a screenshot of a list.
Step 2 — one check-in code that changes job
The entrance code does three different jobs across the event lifecycle, which is exactly why it must be dynamic.
| Phase | Destination | When to switch |
|---|---|---|
| Before the event | Registration form | From printing until the day before |
| Event day | Schedule and room map | The morning doors open |
| After the event | Slides, recording, feedback form | The evening it ends |
Use scheduling so the switch happens on its own: set the window on the code and the destination changes at the hour you chose, without anyone touching a laptop at 8 in the morning.
Step 3 — the programme page
- Keep it one page, mobile-first: times, rooms, speaker names. No PDF — a PDF on a phone means pinch and zoom in a corridor.
- Put the current session at the top, not a full-day grid a visitor has to scroll through.
- Add a plain-text address and a Wi-Fi hint: the programme is the page people open when they are lost.
- Keep the page live after the event and add the recordings; those scans keep arriving for months.
Step 4 — print sizes that work in a crowd
| Placement | Read from | Minimum printed width |
|---|---|---|
| Badge or ticket | 15 cm | 15 mm |
| Table card, handout | 30 cm | 25 mm |
| Welcome desk sign | 60 cm | 50 mm |
| Entrance banner | 2 m | 180 mm |
| Stage screen slide | 8 m | Fill at least a tenth of the screen height |
These are starting points. Run your own link through the <a href="/tools/qr-code-size-calculator">size calculator</a>: a longer destination needs more width at the same distance, and a crowded entrance means people scan from further back than you think.
The week before: the checklist
- Scan every printed asset with two phones, one iPhone and one Android, in the room where it will stand.
- Check the programme page on a 4G connection with Wi-Fi off — venue Wi-Fi rarely works at the door.
- Confirm each ticket reference is rejected on a second scan.
- Set the scheduled destination switch and verify the times, including the time zone.
- Note the short links of every code on one sheet, printed, and give it to the welcome desk.
Perguntas frequentes
- How do I make a unique QR code for each event ticket?
- Export your attendee list as CSV with one row per ticket, put the ticket reference in each destination URL, and run the file through the bulk generator. You get one image per row, named after the reference.
- Can the same QR code be used for check-in and for the programme?
- Yes, if it is dynamic. Point it at the registration form before the event, switch it to the schedule on the day and to the feedback form afterwards. Scheduling makes the switch happen automatically.
- What size should a QR code be on an event badge?
- About 15 mm wide is enough on a badge or ticket, because it is scanned from roughly 15 cm. Entrance banners read from two metres need around 180 mm. Check your own link in the size calculator, since a longer URL needs more width.
- Do QR tickets work without internet at the venue?
- The scan itself works, but a code that points at a web page needs a connection to load it. For door scanning, use a scanner app that validates against a list downloaded in advance, and print the reference in text under the code as a fallback.
- Can someone reuse a screenshot of a QR ticket?
- Yes, unless your system invalidates the reference after the first scan. The QR code is only a carrier; single use has to be enforced by the ticketing system that reads it.
Próximos passos
- QR codes for museums, galleries and visitor sitesThe object label that finally has room for the whole story, audio in every language without renting handsets, and a panel that survives the next rehang.
- QR codes for nonprofits, associations and fundraisersThe donation poster that always shows the current campaign, the event ticket that updates on the day, and the code that finally tells you which poster brings the money in.
- QR codes for trade shows and exhibition standsLead capture without a clipboard, spec sheets per product, the catalogue as a PDF nobody has to carry, and a report that finally tells you which show paid for itself.